
Simulate requests and web content in Chrome
In Chrome 117, a very practical new feature has been released, which allows us to replace web content locally** (Including XHR and Extract Request Data)
Overview
In our daily development, various data scenarios are often needed to be simulated when debugging. Usually, we can use some development tools or simulate based on the scaffolding-related tools used in the project.
Tips
If you are using vite, it is recommended to enable mock support for your project using the vite-plugin-mock-dev-server plugin. Can meet most demand scenarios, not only support http requests, but also websockets.
Starting with Chrome 117, we have provided the overrides content function, which brings features including:
- Replace HTTP response header
- Replace HTTP response content
- Replace web resources
At the same time, it also saves the replaced content as a copy in the local folder. When the web page is reloaded, the developer tool uses these local copies. Instead of real network resources.
limit
Local replacement works with network response headers and most file types (including XHR and fetch requests), with some exceptions:
- The developer tool does not save changes to the DOM tree of the
Elementspanel. - If you modify a CSS in the
Stylespane and the source of that CSS is an HTML file, the developer tool does not save the changes.
However, you can modify the HTML file in the Sources panel.
Set local replacements
Enable
- First open the
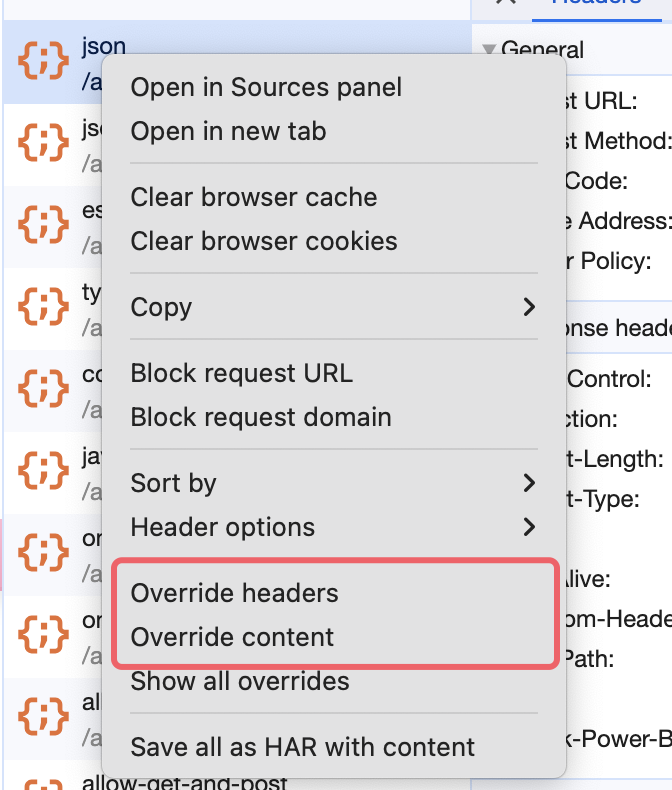
Networkspanel, first select the request you want to replace. Select override header or override content from the drop-down menu.
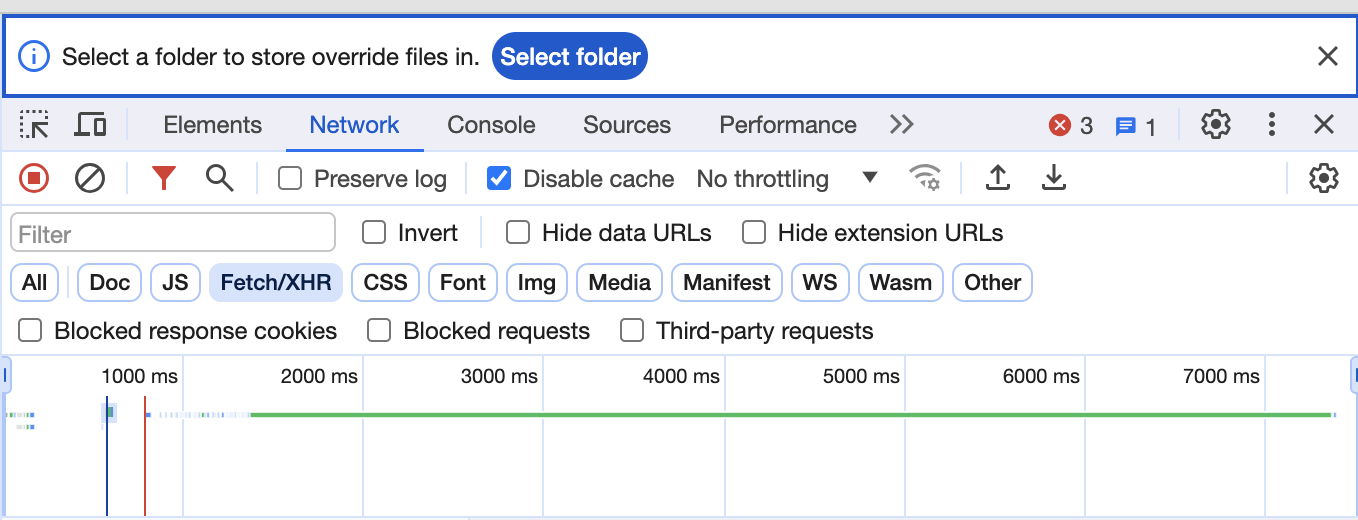
- If you have not set a local replacement item, the developer tool will prompt you to select a local folder in the action bar at the top. Used to save the replaced file to a local folder as a copy.
After selecting a folder, the developer tool will prompt you to authorize the folder and click Allow / Allow:

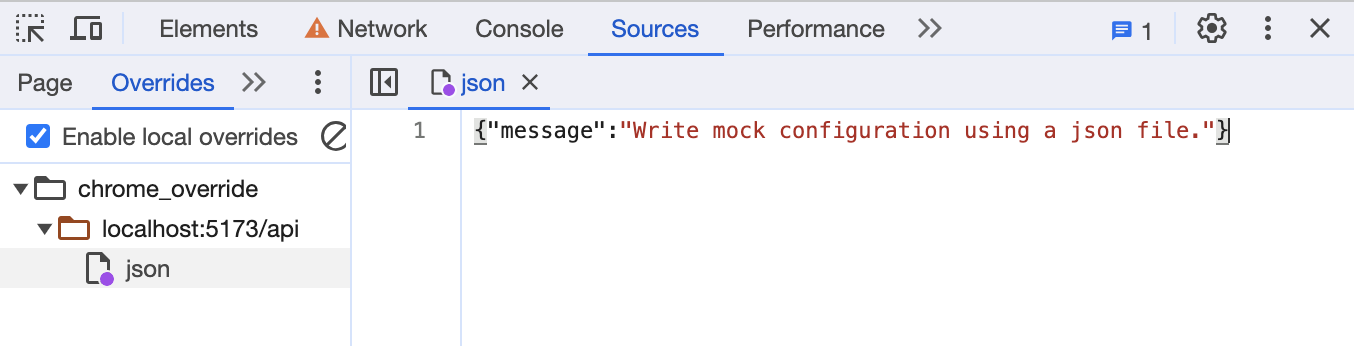
- After the authorization is completed, the developer tool will jump to the
Sourcespanel. Here you can see the newly generated Mock file. This file corresponds to the requested content you want to replace, you can modify it directly here:
Disable
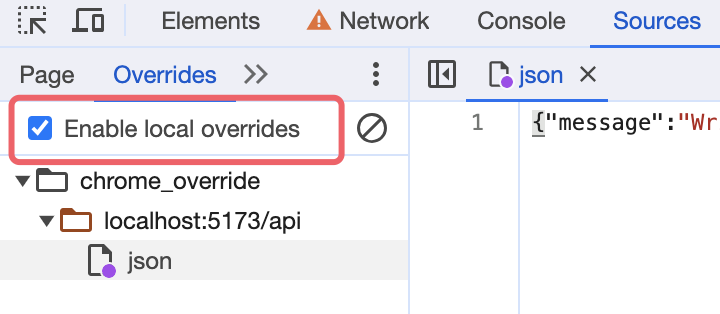
In the Sources > overrides panel, uncheck Enable local override to disable local replacement.
Replace response content
When using Replace Response Content, we can simulate the data we need locally for debugging without having to wait for the backend and obtain backend support.
In the Networks panel, right-click the interface you want to modify. In the pop-up menu, select the Override content option:
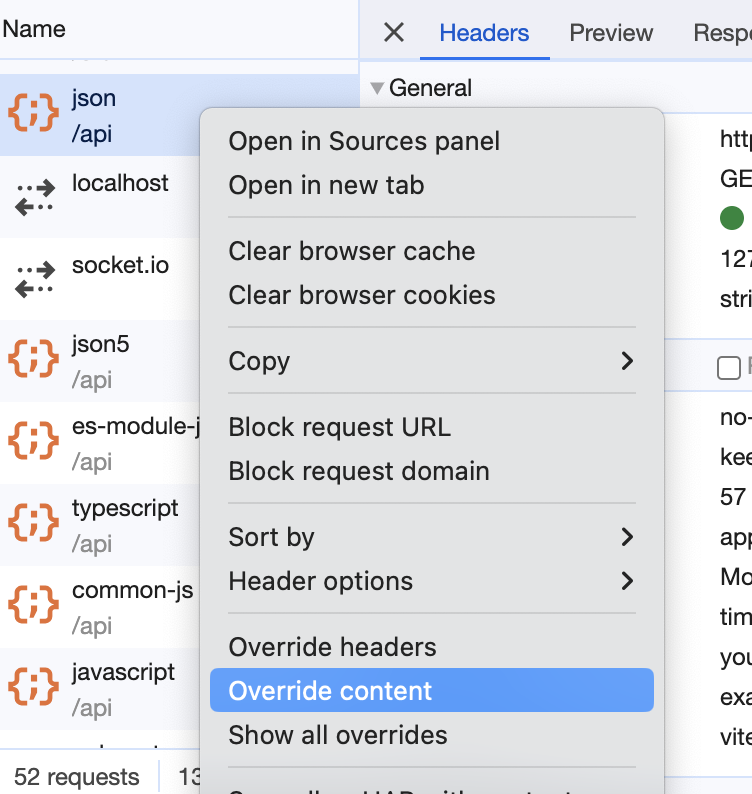
The developer tools will jump to the Sources > Overrides panel and open the corresponding mock file:
You can modify the response content directly here, then press Command /Ctrl + S to save the file, and then refresh the page
Replace response header
Modify a single request response header
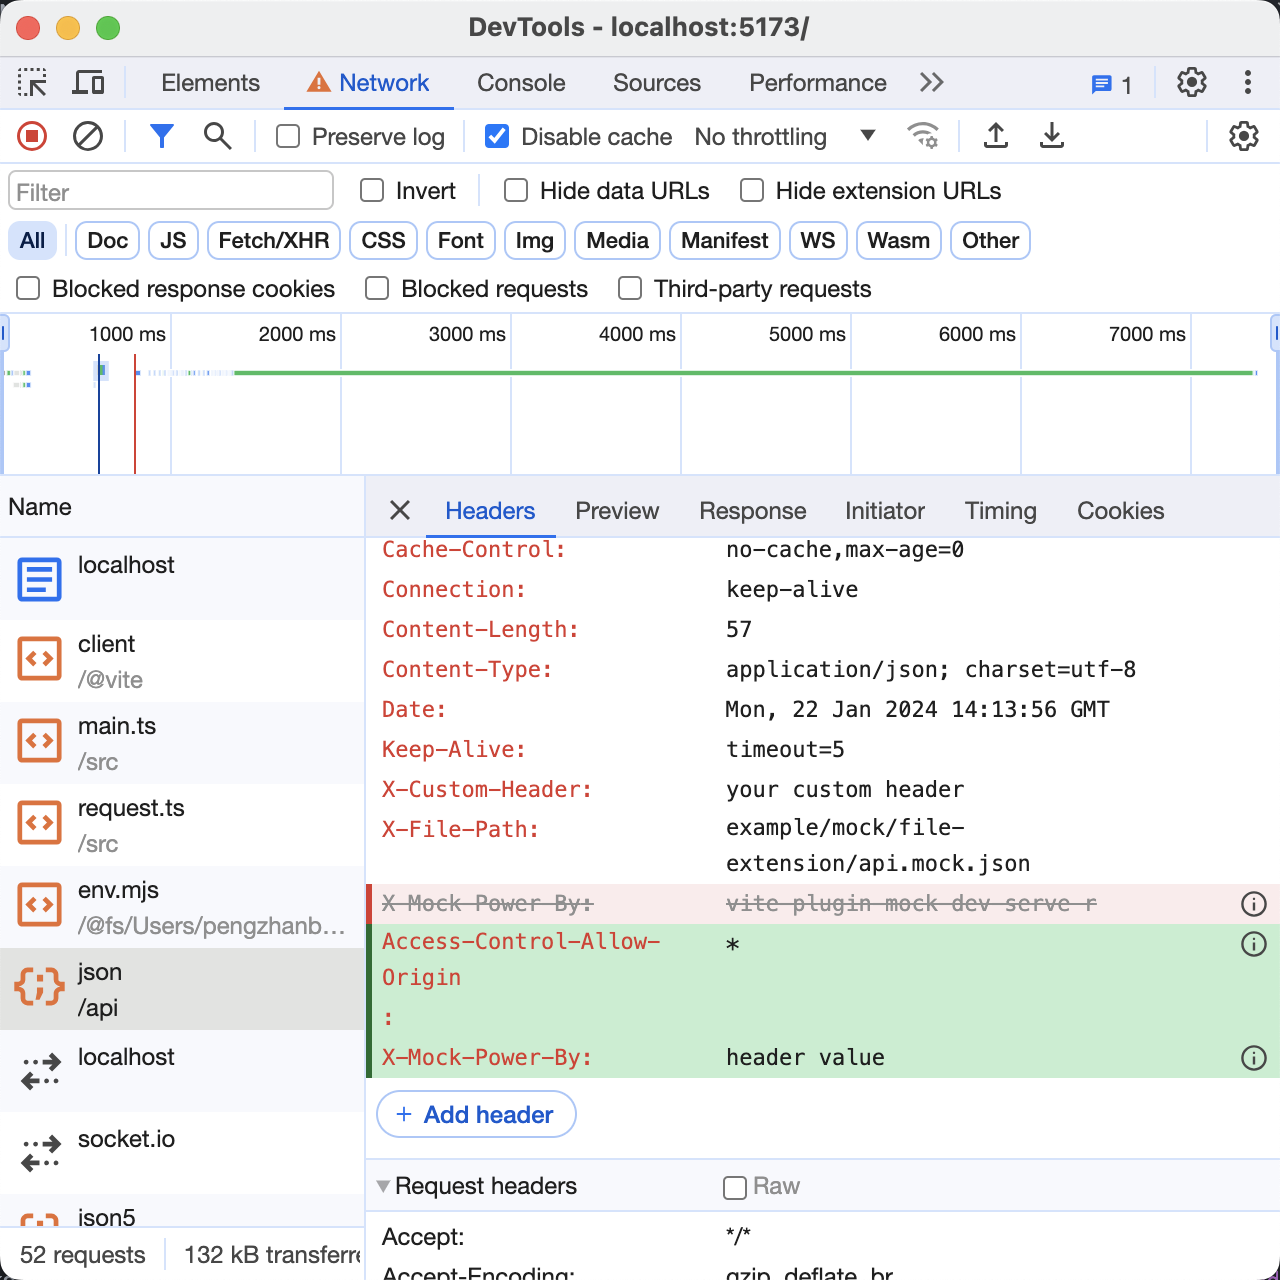
In the Networks panel, select the interface you want to modify, right-click, and then in the right-click menu, select the Override header option:
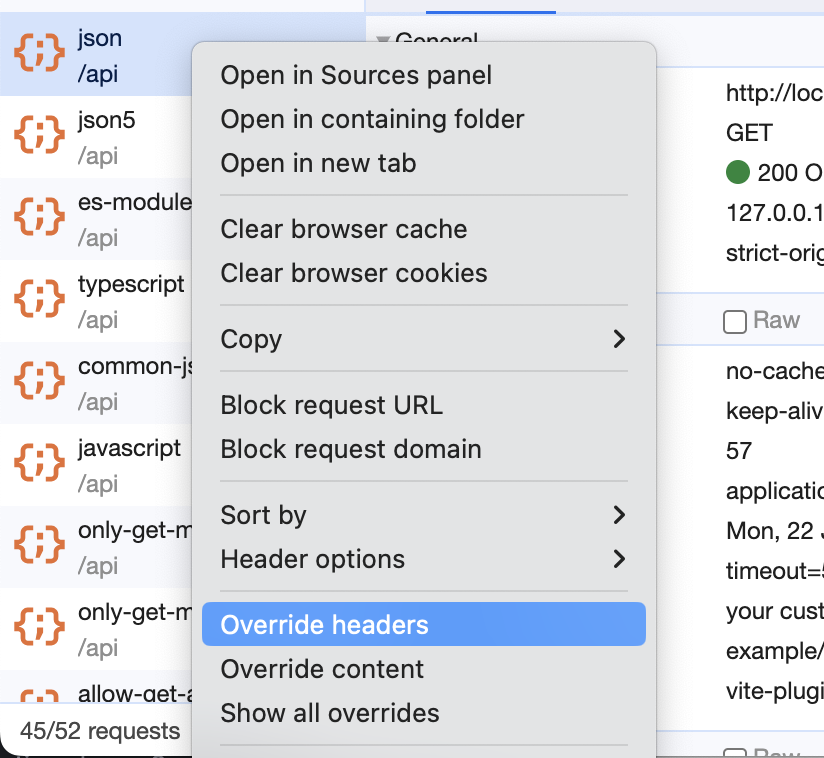
At this time, the panel Header will enter an editable state:
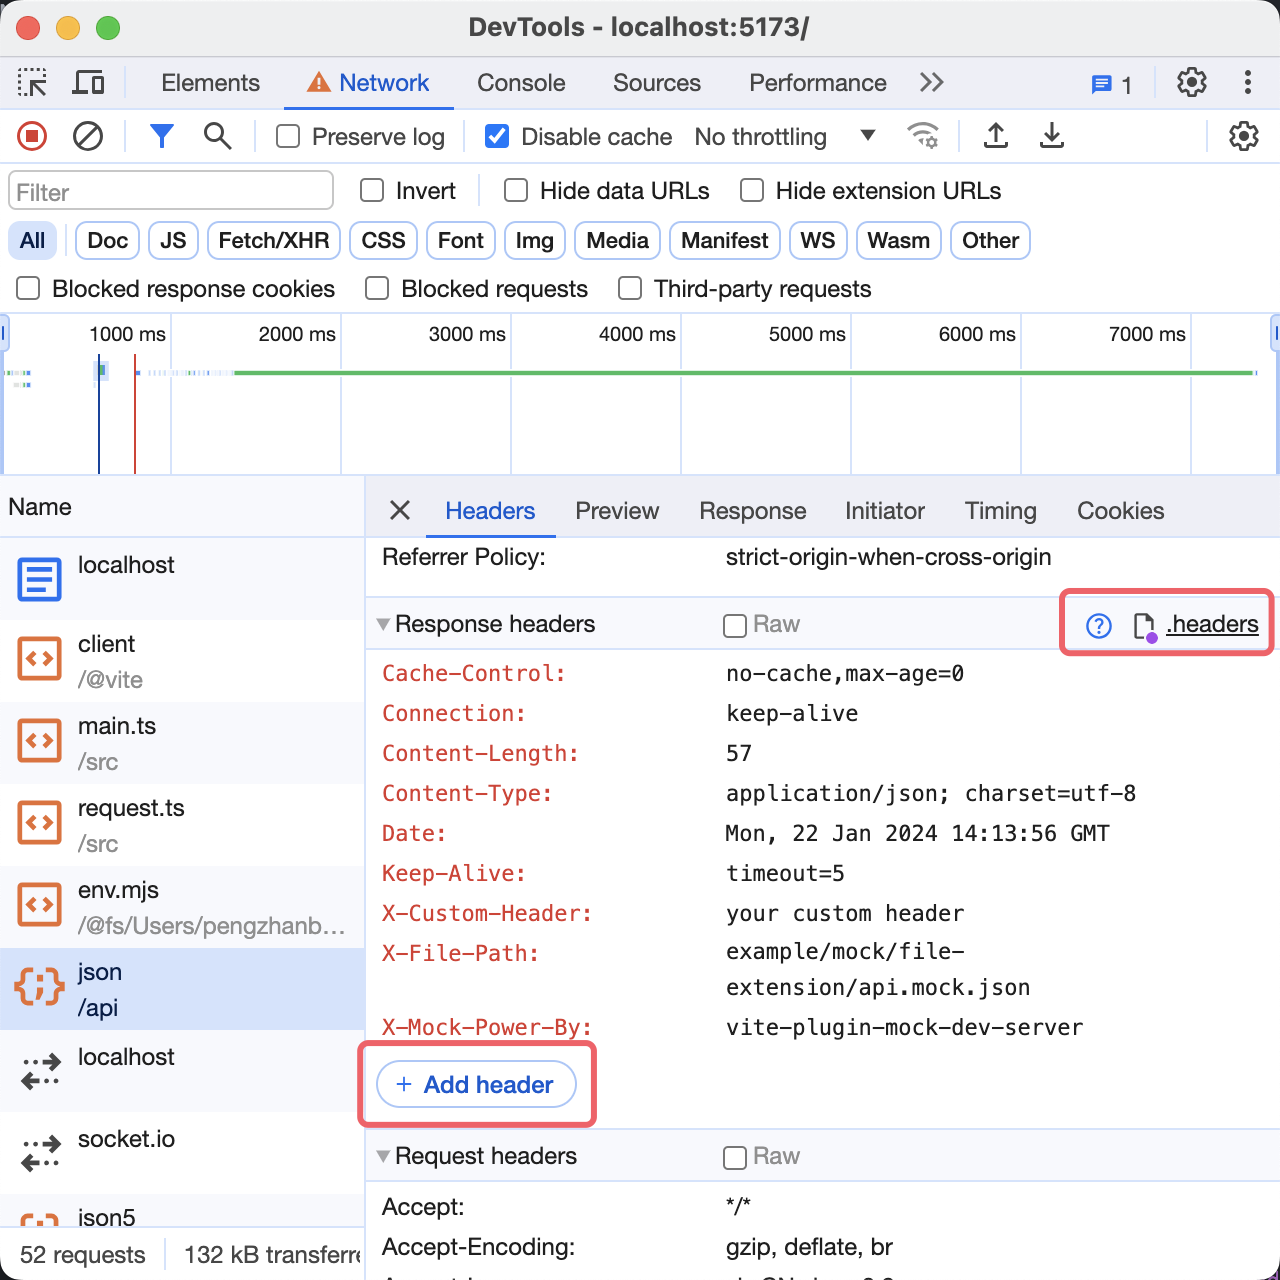
You can click Add Header to add a new response header, or you can directly click the value you want to modify to modify the response header.
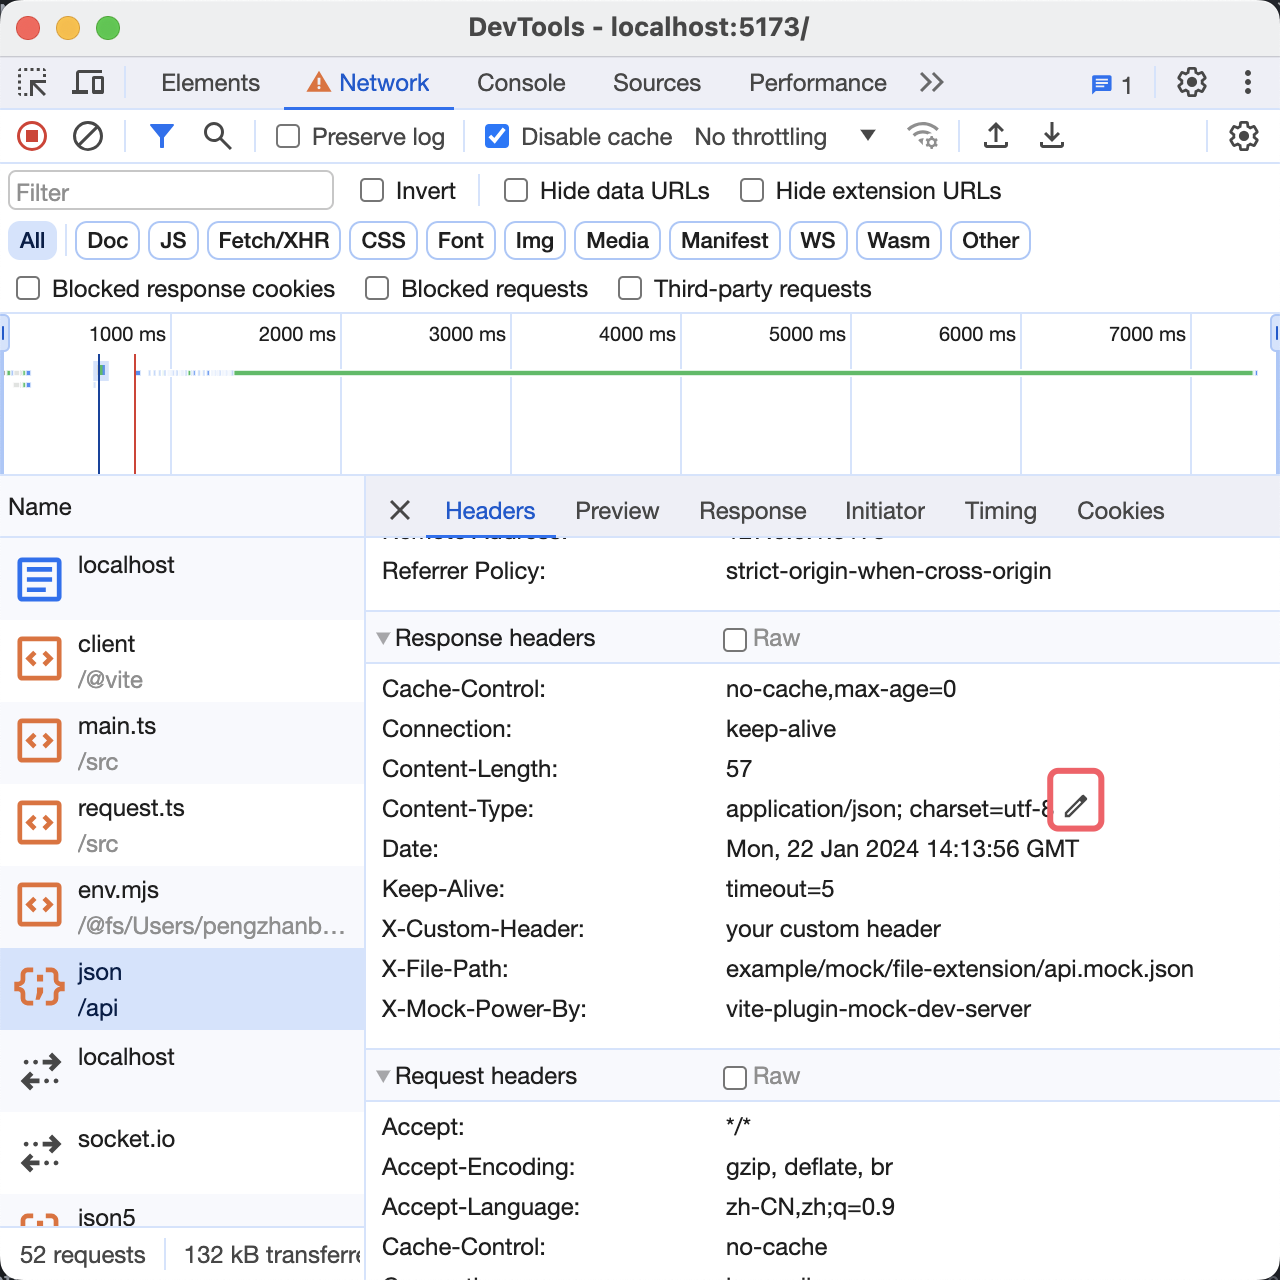
In addition, if you just need to simply modify a certain value, you can also directly hover over the Header value you want to modify, and then click the Edit icon to modify the response header.
Please see an example, adding a header that allows cross-domain requests, deleting a response header and modifying the response header:
Modify all request response headers
If you need to modify the response headers for all requests, click the .headers button to the right of the Response Headers panel:
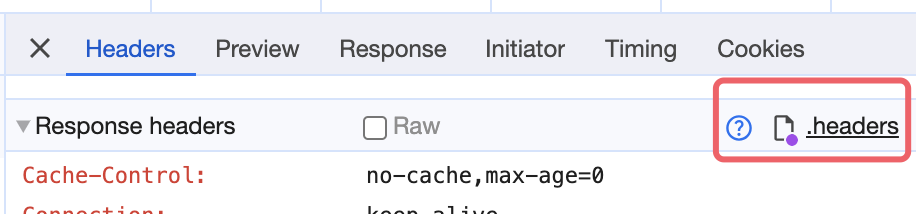
The developer tool will strip into the corresponding Sources > Overrides > .headers file:
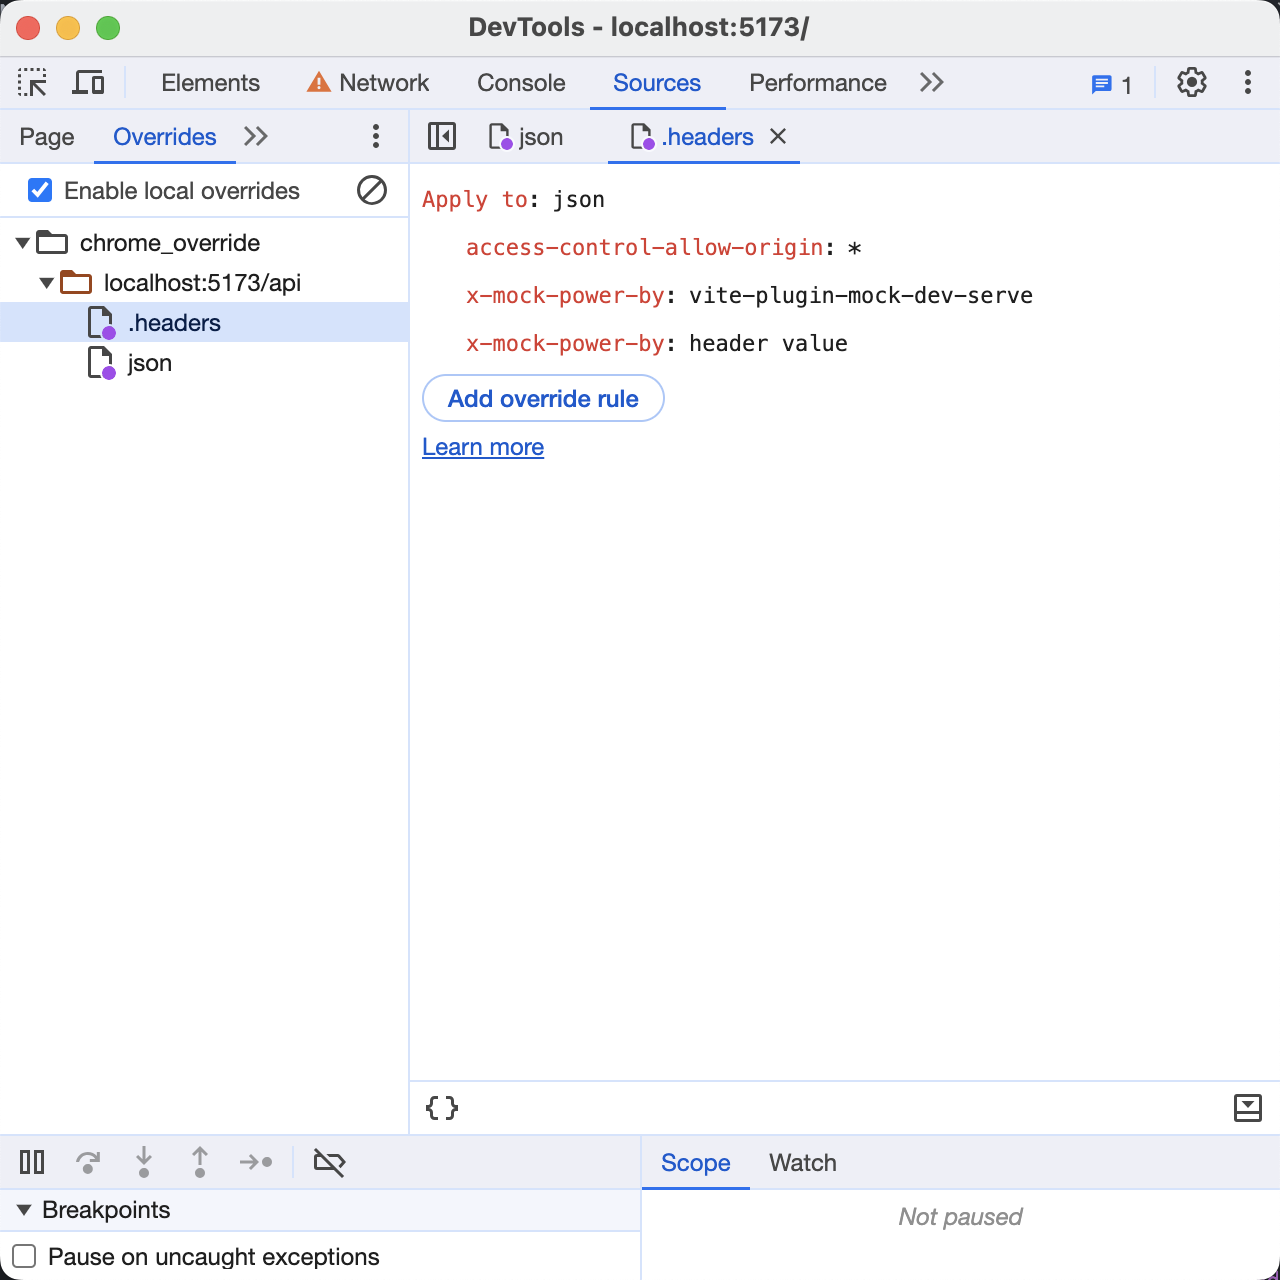
Here, you can click the Add override rule button to add a new response header.
Where Apply to represents the requested interface address that the rule matches. You can use the * wildcard to match all interfaces and use ? to specify a single character.
After the modification is complete, don't forget to use Commands/Ctrl + S to save the .headers file.
You can then refresh the page to apply all the changes.
Replace Web Content
You can view all resource contents of the current page directly in Sources > Page, and then find the resource contents you want to modify. Right-click and select Override content from the menu.
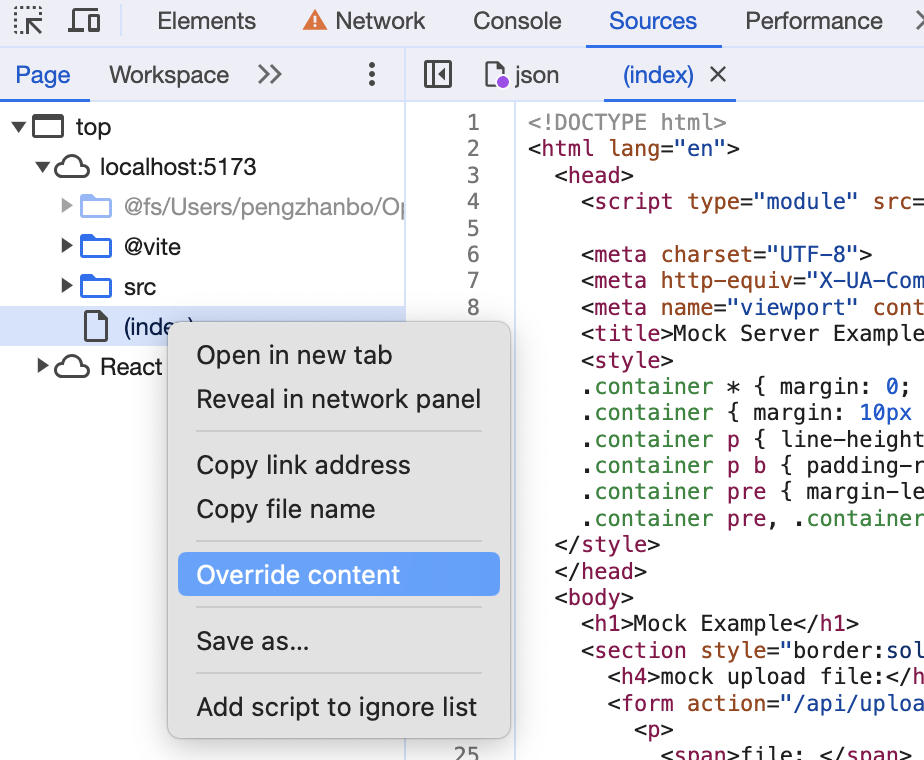
The developer tool will jump to the Sources > Overrides panel and create a Mock copy of the resource content. You can modify it directly, save the file in Command /Ctrl + S and then refresh the page.